


HOW TO USE CRIMP BEADS & CRIMP TUBES
When creating jewelry, you want the best findings for the project, so it's important to learn all about the crimps you will be using.
If you are going to complete a piece of jewelry, for example, bracelet or necklace in a stringing technique, you have to learn how to work with crimp beads.
Follow our easy step-by-step instructions below on how to use crimp beads & crimp tubes.
Crimps are designed to work with Beading Wire.
If you are working with beading wire, it is more than likely you will work with crimps.
These durable little findings will provide your designs with security and add professional finishing touches.
Best of all, they are easy to use!
SHOP BEADING WIRE WITH BEADED CREATIONS HERE
WHAT IS A CRIMP BEAD?
Unfamiliar with crimp beads?
Crimp beads are small beads with thin walls, made to be squashed and compacted into shape using Crimping Pliers.
Crimp beads are used to hide the knots in your beaded necklace or bracelet that are holding your pieces together, but can also strengthen these points in your jewelry designs, making sure your customers receive a piece of jewelry that will last.
SHOP CRIMPING PLIERS WITH BEADED CREATIONS HERE
CRIMP BEADS VS CRIMP TUBES
Crimps come in two different forms: as a Bead or as a Tube.
Confused about which crimp to use?
Don’t worry, it’s mainly down to your own preference.
They will essentially give a similar finish as the crimp beads will become flattened.
However, you may find that crimp tubes can be slightly less likely to crack as you squash them into place with your pliers.
Remember that with crimp tubes, you can also squash them into a shape that closely resembles a bead anyway, so in the end, it really does depend on the overall effect you would like to create with your final piece.
Crimp Covers are also a great option for a more professional finish, designed to fit over the crimp bead or crimp tube.
They look like a bead, so it gives the design a more finished look.
SHOP CRIMP BEADS, CRIMP TUBES AND CRIMP COVERS WITH BEADED CREATIONS HERE
CRIMP BEADS
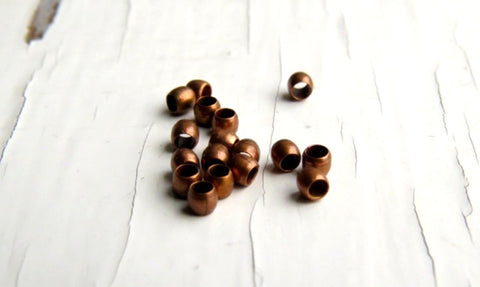
Crimp beads/balls/rounds are, as you might expect, round beads, kind of like tiny donuts.
Crimp beads come in a variety of sizes and metals.
To secure them to jewelry wire, flatten the crimp bead with a pair of flat or chain nose pliers.
The flattened bead grips the jewelry wire.
The image below shows what a crimp bead looks like when it is finished and crimped to wire.
If done properly, the crimp bead will be very secure, but if the crimp bead is squeezed too hard it can break or at least be weakened and could fail over time as the jewelry item is worn.
Over-squeezing can also bite into the jewelry wire itself, causing it to fray or break, which will also weaken the jewelry item.
It just takes a little practice to get the feel of crimping and once you have it down it's easy to do!
CRIMP TUBES

Crimp Tubes come in a variety of sizes and metals, too, and some even have patterns on them.
To crimp them, you need crimping pliers.
Crimp Tubes are cylindrical, like a length of tubing that has been chopped up into tiny sections.
They are also a little longer and look larger than their ball counterparts, even when the diameter is the same.
They typically have slightly thicker walls than crimp rounds, and are generally the type of crimps you should be using if you want your jewelry to last and stand up to wear.
To secure them to the jewelry wire, crimp the wire with a crimping tool.
The crimping pliers have two stations.
The first station puts a crimp in the crimp tube and the second station folds the crimped tube in half.
The crimped and folded tube grips the jewelry wire.
The image below shows what a crimp tube looks like when crimped to jewelry wire.
The same rules apply here as well; if done properly, the crimp tube will be very secure.
Over-squeezing can cause breakage of the crimp tube itself or the jewelry wire.
WHAT SIZE CRIMPS TO USE?
Choosing the right size crimp tube or crimp bead is important when it comes to giving your beaded jewelry a professional finish.
Although there are no hard and fast rules to go by.
If the size of your crimps are a little too big for the wire you’re using, you may find that the crimp will not securely grip the wire in place, leaving your piece vulnerable to breaking at a later date.
You should also avoid using crimps that are too small for the wire you’re working with.
While it may fit, if it’s too tight the wire may not sit correctly in the crimp, making it difficult to secure it into place.
HOW TO FIND THE CORRECT CRIMP SIZES
Crimps are available in different sizes, and these sizes refer to the inner diameter of their holes.
However, jewelry makers who specialize in beading often find that longer crimp tubes provide a more stable finish than shorter ones, but a shorter crimp may give you the neatest finish.
Different sized crimps are applicable depending on what size beading wire you are using, how many strands in the necklace/bracelet, etc.
Using the right size crimp bead or tube is also very important.
If the crimp is too large for the jewelry wire, it won’t be able to grip the wire properly and it could slip, causing the jewelry piece to fail.
If the crimp is too small, particularly with crimp tubes, the jewelry wire won’t have room to separate for the crimp action and you won’t get a good fold.
So how do you choose the best size crimp for the job?
Most often, the jewelry wire in a design will pass through the crimp twice.
Multiply the jewelry wire diameter by two (twice through the tube).
Then choose a crimp with an inside diameter that is slightly larger than that number.
WHAT ARE CRIMPING PLIERS?
To secure your jewelry in the right way you need to get special tools.
There are several options.
Firstly, to make your jewelry look perfect, you should use special crimping pliers.
You can recognize them by grooves inside the nose of the pliers.
The main benefit of using crimping pliers is they allow you to get a neat round shape of crimp bead.
If you don't have a pair of crimping pliers, you can however also use regular chain nose pliers or flat nose pliers.
SHOP BEADING PLIERS WITH BEADED CREATIONS HERE

WHAT SIZE CRIMPING PLIERS TO USE?
Before you buy your own crimping pliers you may be wondering which size will be most useful to you.
Generally, there are three different sizes of crimping pliers: micro pliers, regular pliers, and mighty pliers.
Very small crimp tubes (between 0.8-1mm) will require micro pliers.
Those that are slightly larger (between 1-2mm) will require regular pliers, and anything from 3mm or larger will require mighty crimping pliers.
Understandably, you may not want to invest in all of these crimping pliers at once.
Instead, you may want to try a multi-tool crimping pliers that allow you to work with varying crimp tube sizes.
This a great way of saving money on tools and making sure that you try using different sized crimps before you settle on a size that works for you.
Generally, most people will be working with 2mm crimp tubes, and will want to use standard crimping pliers.
These are what we are using in the examples below.
Get to know your crimping pliers.
Notice that your pliers will have two notches.
The one that is closest to the handles features a small dimple to help the crimp bead form a figure of eight.
The notch that is closest to the tip of the pliers will fold the crimp, use this to form a tube.

HOW TO USE CRIMP BEADS STEP-BY-STEP
Prepare your all materials: Your piece of jewelry, a Crimp Bead (tube shaped or round shaped) and Crimping Pliers.

STEP 1
Tip. Make sure that the last two or three beads on your strung piece are large enough to cover the extra beading wire.

STEP 2

STEP 3

STEP 4

STEP 5

STEP 6
It is VERY important that the crimp tube sits exactly in the back section, as they are designed to fit each other perfectly.

STEP 7

STEP 8
Tip. Add a Crimp Bead Cover for a finished look - attach it over the crimp bead and squeeze it.
Read The Blog Post: How To Use Crimp Bead Covers Here for step-by-step instructions on how to use Crimp Bead Covers.